This week began with connecting the HC-SR04 ultrasonic rangefinder to the circuit. This was the piece of apparatus that would be used to tell the robot where the can was and guiding it towards the can by sending out ultrasonic waves that would rebound back off the can to a receiver giving the robot the knowledge of where to drive towards. This allowed the distance to be calculated between the can and the robot.

In the video above you can see how the rangefinder tells the motors to move forward once an object or surface within the given radius is found.
This following code was applied to the arduino to give the instructions of what to do when the rangefinder picked up the position of the can. We also had a switch within our coding so that once the robot did hit the can it would then reverse so to abide by the competition rules.
// Code used for Tip the Can for RoboSumo
// Written by Cillian O'Brien
// Last Updated 26.02.2020

  // Defining Pins rather than using ints, seems to solve a few issues that were happening
  #define button 4      // Switch button
  #define echoPin 5     // Trigger Pin for Sensor
  #define trigPin 6     // Echo Pin for Sensor

  long duration, distance;      // Defines variables for duration of pulse, and distance from object

void setup() {
  Serial.begin(9600);   // Sets baud rate for info from sensor [FOR TESTING]
  pinMode(trigPin, OUTPUT);   // Set up the trigger pin
  pinMode(echoPin, INPUT);    // Set up the echo pin

  pinMode(2, OUTPUT); // Motor 1 Forward
  pinMode(3, OUTPUT); // Motor 1 Backward
  pinMode(8, OUTPUT); // Motor 2 Forward
  pinMode(9, OUTPUT); // Motor 2 Backward

  pinMode(button, INPUT);  // Switch Voltage Check

}

void loop() {

  int push = digitalRead(button);      // Setting up var for reading when button is pushed

  digitalWrite(trigPin, LOW);
  delayMicroseconds(20);
  digitalWrite(trigPin, HIGH);  // Set trigPin high
  delayMicroseconds(20);
  digitalWrite(trigPin, LOW);   // Send pulse for 20 us


  duration = pulseIn(echoPin, HIGH);  //pulseIn detects the duration of pulses from trigger
  distance = (duration/2)*0.034;  // Time to reach object * Speed of Sound in cm/us


  Serial.print(distance);   // This is to print the distance (in cm) of the rangefinder
  Serial.println(" cm");    // is detecting [FOR TESTING]


  if (push == 1) {          // Button is Pressed [Hit the Can]

    digitalWrite(2, LOW);         // Keeps Going Forward for 1 Second
    digitalWrite(3, HIGH);
    digitalWrite(8, LOW);
    digitalWrite(9, HIGH);
    delay(1000);

    digitalWrite(2, HIGH);        // Goes Backward for 2 Seconds
    digitalWrite(3, LOW);
    digitalWrite(8, HIGH);
    digitalWrite(9, LOW);
    delay(2000);

    digitalWrite(2, LOW);         // Stops for 60 Seconds
    digitalWrite(3, LOW);
    digitalWrite(8, LOW);
    digitalWrite(9, LOW);
    delay(60000);

  }

  else {                    // Button is Not Pressed [Hasn't Hit the Can]

    if (distance < 10) {
      // Object within Range
      digitalWrite(2, LOW);      // Goes Forward [Sees Can]
      digitalWrite(3, HIGH);
      digitalWrite(8, LOW);
      digitalWrite(9, HIGH);
    }
    else {
      // Object Out of Range
      digitalWrite(2, LOW);       // Turns [Default Mode]
      digitalWrite(3, HIGH);
      digitalWrite(8, HIGH);
      digitalWrite(9, LOW);
    }
  }

  delay(50); // Delay to allow ultrasonic reflections to die out


}
After successfully building the circuit with the working motors, sensor, switch and the correct coding uploaded to the arduino that is needed for the Tip The Can (TTC) competition in the previous weeks we were now able to research how we would piece the main components together in order for them to successfully complete the TTC. At the time we were not aware of the laser cutting service available to build the shell so instead we went for a small piece of plywood that was used as a platform to rest the battery pack and breadboard on whilst the switch and motors were connected on the bottom. Using blue-tac and glue we were able to secure each part together of the robot to finish with our final design below.
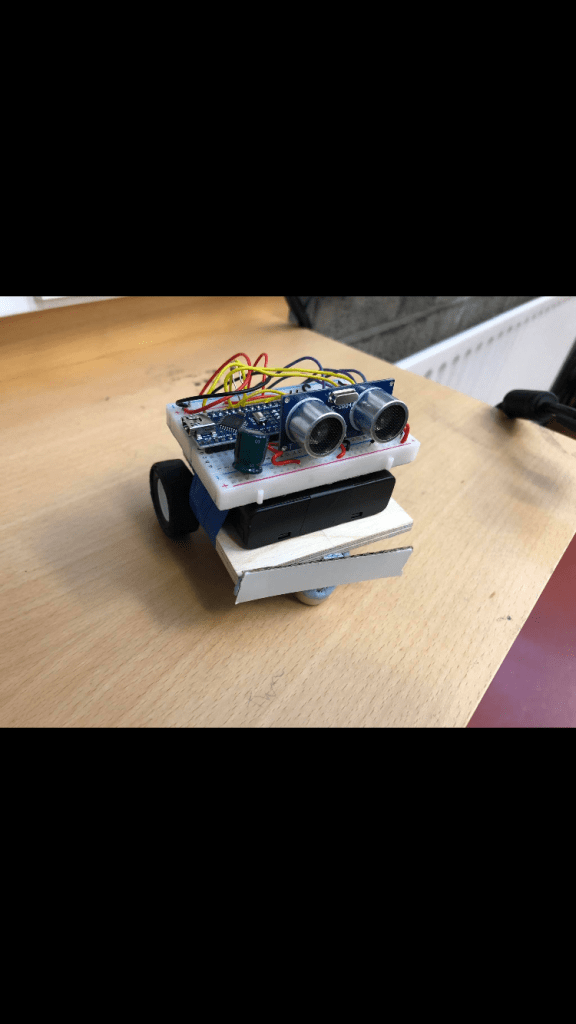
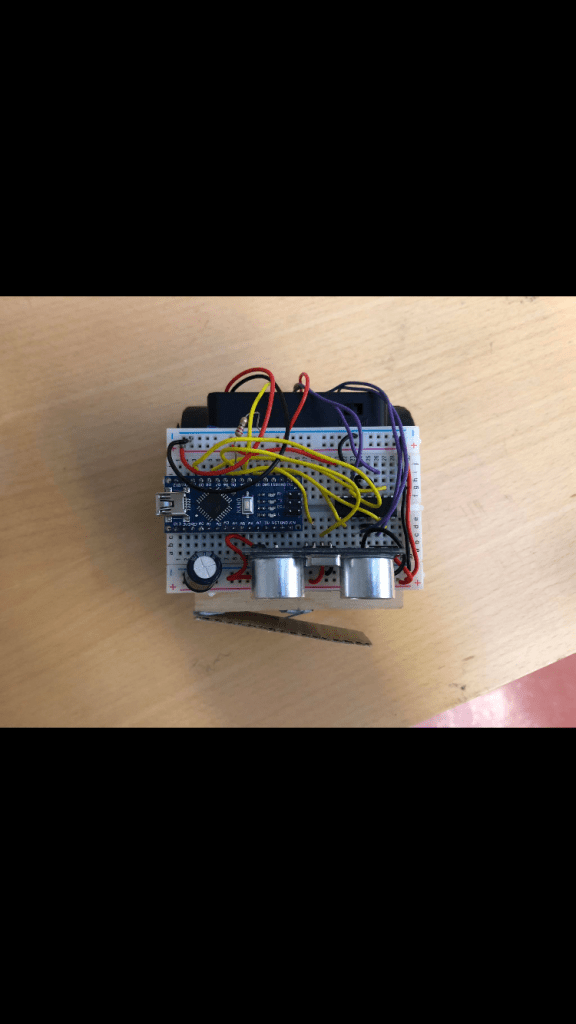
Thus we were ready for week 5’s competition……
 Adam's RoboSumo